"--namespace-label=cis_scanner_zone=zone_1",配置
Table of Contents
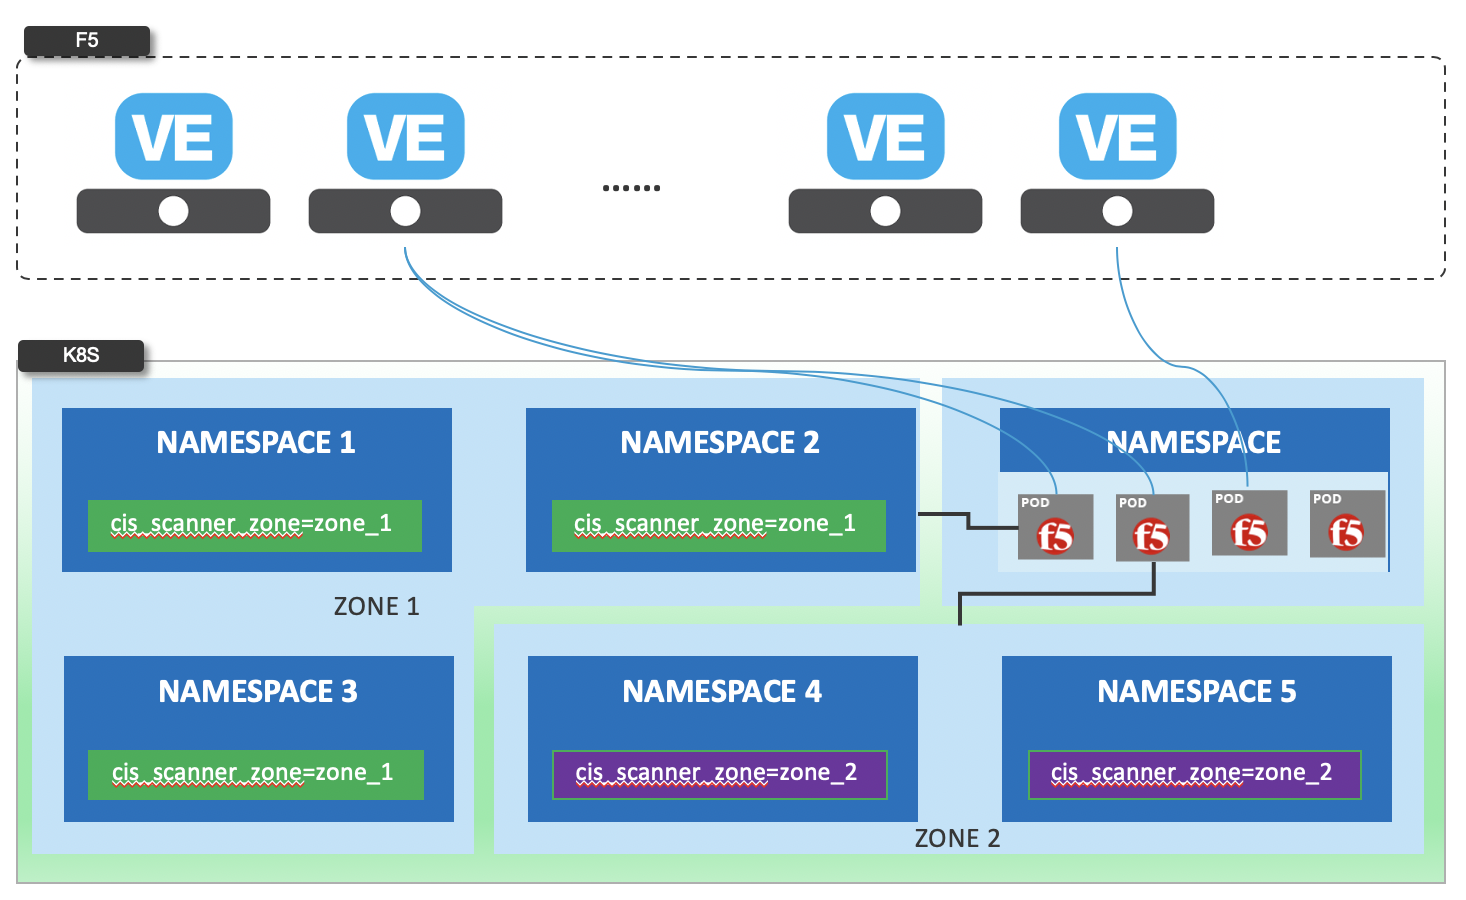
Namespaces isolation
namespace label
As depicted in below figure:
-
同一个 K8S 内,一个 CIS 可只监控一个分区,多个 CIS 并行工作,确保了容器计算层 CIS 的性能
-
同一个 K8S 内的 Service 可以发布到不同的 F5 HW/VE,确保了容器路由层 F5 的性能
1. cis argument
2. Get Code
git clone https://github.com/cloudadc/container-ingress.git
cd container-ingress/f5-cis/namespaces-isolation
3. Deploy 4 apps within 4 namespaces
kubectl create -f cis.yaml

$ kubectl get ns --show-labels | grep cistest10*
cistest100        Active   78s     cis_scanner_zone=zone_1
cistest101        Active   78s     cis_scanner_zone=zone_1
cistest102        Active   78s     cis_scanner_zone=zone_1
cistest103        Active   78s     <none>
the first 3 namespace has cis_scanner_zone, the cistest103 didn’t.
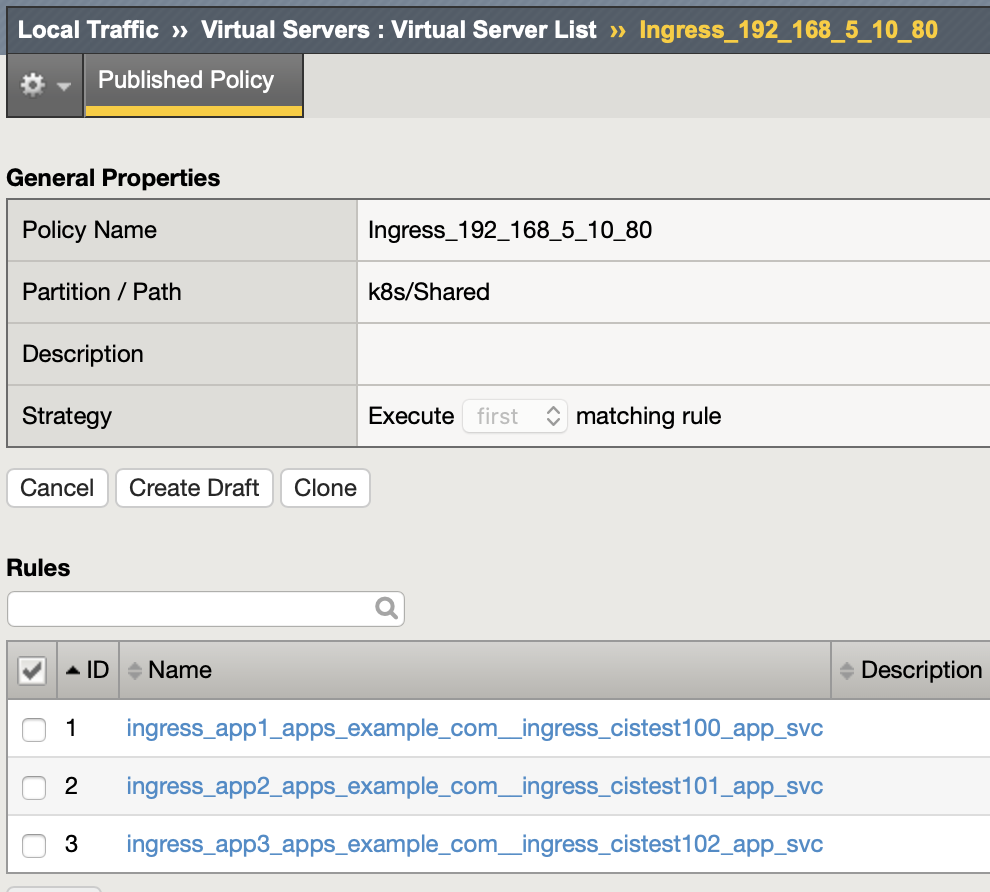
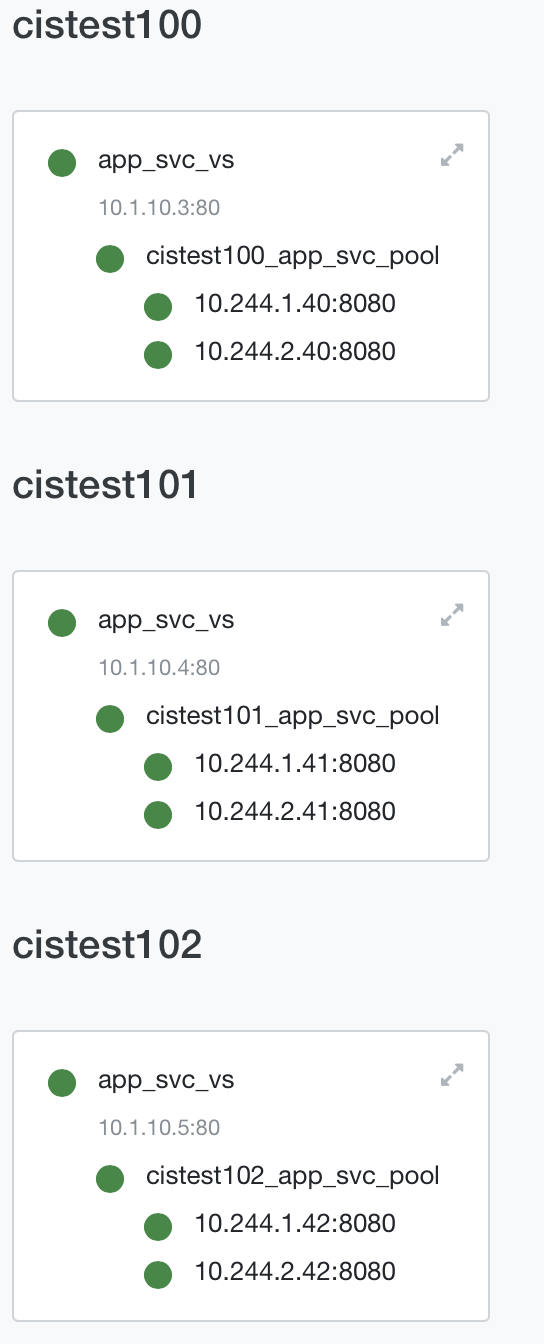
4. deploy ingresses
kubectl apply -f ingress.yamlthere will be 4 ingress object created, only the first 3 will deploy to F5 due to the namespace isolation.
5. deploy configmap
kubectl apply -f cm.yamlthere will be 4 configmaps created, only the first 3 will deploy to F5 due to the namespace isolation.
5. deploy configmap
kubectl apply -f cm.yamlthere will be 4 configmaps created, only the first 3 will deploy to F5 due to the namespace isolation.
explicit namespace
Using the explicit namespace to implement isolation, the only difference is cis argument, below is an example of explicit namespace isolation:
"--namespace=cistest01",
"--namespace=cistest02",
"--namespace=cistest03",
CIS Robust
Re-create CIS POD
// CIS + AS3 Deploy 2 services
kubectl create -f cis.yaml
kubectl apply -f deploy.yaml
kubectl apply -f cm.1.yaml

// Execute the following commands simultaneously to deploy 3rd service
kubectl delete pod $(kubectl get pods -n bigip-ctlr --no-headers | awk '{print $1}') -n bigip-ctlr
kubectl apply -f cm.2.yaml

// Force cistest101 pod restart
kubectl delete pod $(kubectl get pods -n cistest101 --no-headers | awk '{print $1}') -n cistest101

//Delete all service
kubectl delete -f cm.2.yaml
Refer to link for more details.
Re-start F5 VE
Refer to link for detailed steps.
性能调优
调优前后性能对比
Stage,Create,Delete
Beofre Tunning,115,175
After Tunning, 110,165
调优
参数 |
调优前 |
调优后 |
provision.extramb |
500 |
1000 |
restjavad.useextramb |
false |
true |
maxMessageBodySize |
134217728 |
调优步骤
tmsh modify sys db provision.extramb value 1000
tmsh modify sys db restjavad.useextramb value true
tmsh save sys config

curl -s -f -u admin:F5demo@666 -H "Content-Type: application/json" -d '{"maxMessageBodySize":134217728}' -X POST http://localhost:8100/mgmt/shared/server/messaging/settings/8100